반응형
SpringBoot에서 사업자 번호 없이 프로젝트 내에서 토스, 카카오페이 결제를 만들어보자.
💡 포트원(PortOne) 사용 이유 : 팀 프로젝트 과정에서 결제 서비스를 추가 할 상황이 있었는데 카카오페이 테스트결제를 넣어도 되지만, 클라이언트 단에서 실제로 결제를 하는 것 같은 효과를 내고 싶었고, 카카오 페이 테스트 결제에서는 Back-end단에서 결제가 정확히 완료 되었는지 취소 되었는지 불투명하여서 결제 관련 API를 찾다가 포트원 API를 찾음.
포트원 지원 결제수단 목록
card(신용카드)trans(실시간계좌이체)vbank(가상계좌)phone(휴대폰소액결제)paypal(페이팔 SPB 일반결제)applepay(애플페이)naverpay(네이버페이)samsungpay(삼성페이)kpay(KPay앱 )kakaopay(카카오페이)payco(페이코)lpay(LPAY)ssgpay(SSG페이)tosspay(토스간편결제)cultureland(컬쳐랜드)smartculture(스마트문상)culturegift(문화상품권)happymoney(해피머니)booknlife(도서문화상품권)point(베네피아 포인트 등 포인트 결제 )wechat(위쳇페이)alipay(알리페이)unionpay(유니온페이)tenpay(텐페이)pinpay(핀페이)ssgpay_bank(SSG 은행계좌)skpay(11Pay (구.SKPay))naverpay_card(네이버페이 - 카드)naverpay_point(네이버페이 - 포인트)paypal(페이팔)toss_brandpay(토스페이먼츠 브랜드페이)
- 포트원 API 장점 : Back-end(Spring)에서 하나의 구현으로 여러 결제수단을 동시에 사용 가능
이 글에서는 테스트 결제 부분에 대해서 설명합니다.
- 실 결제는 사업자 번호와 가맹점 신청이 있어야 가능합니다.
- 우선 포트원(PortOne)에 회원가입
https://portone.io/
- 결제 수단 추가 및 API Key 발급
https://admin.portone.io/integration
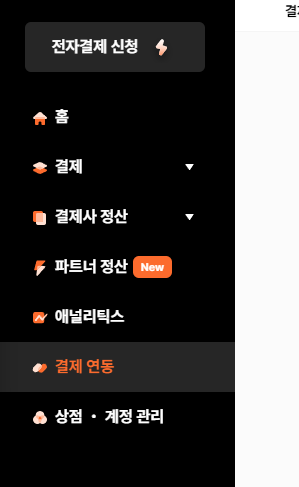
- “결제 연동” 메뉴로 이동

- “내 식별코드 - API Keys” 클릭
API Key가 없으면 “발급”
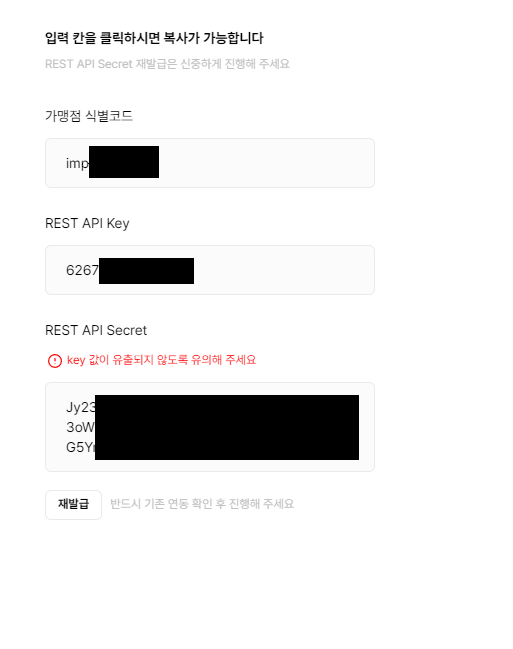
- 결제 수단 추가
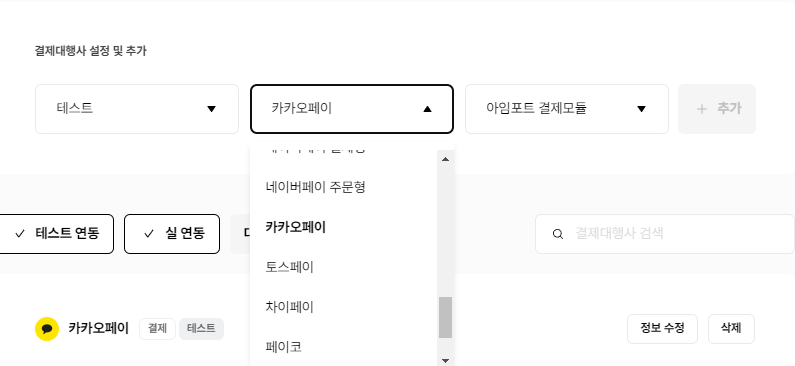
- 필자는 “카카오페이” 추가
Front-end(React) 구성
- React상에서 구현
public - index.html의태그에 포트원 SDK 추가
<script src="https://cdn.iamport.kr/v1/iamport.js"></script> - Payment.js
import React, {useState} from 'react';

function App() {
  const [amount, setAmount] = useState(0);

  const handleChange = (e) => {
    setAmount(e.target.value);
  }

  const ClickChargeBtn = (pg_method, amount, nickname, redirect_url) => {
    const { IMP } = window;
    IMP.init('imp.........'); // 가맹점 번호 지정
    IMP.request_pay({
      pg : `${pg_method}`, // 결제 방식 지정
      pay_method : 'card',
      merchant_uid: `mid_${new Date().getTime()}`, // 현재 시간
      name : '결제 품목 및 제목 지정',
      amount : `${amount}`, // 충전할 금액
      buyer_email : '구매자 이메일',
      buyer_name : `${nickname}`, // 충전 요청한 유저의 닉네임
      buyer_tel : '010-1222-2222',
      buyer_addr : '서울특별시 강남구 삼성동',
      buyer_postcode : '123-456',
      m_redirect_url: `${redirect_url}` // 만약 새창에서 열린다면 결제 완료 후 리다이렉션할 주소
  }, function (rsp) { // callback
      if (rsp.success) { // 만약 결제가 성공적으로 이루어졌다면
        alert("결제 성공");
      } else {
        alert("결제 실패");
      }
  }
  );
}
  return (
    <div className="App">
      <h1>Test</h1>
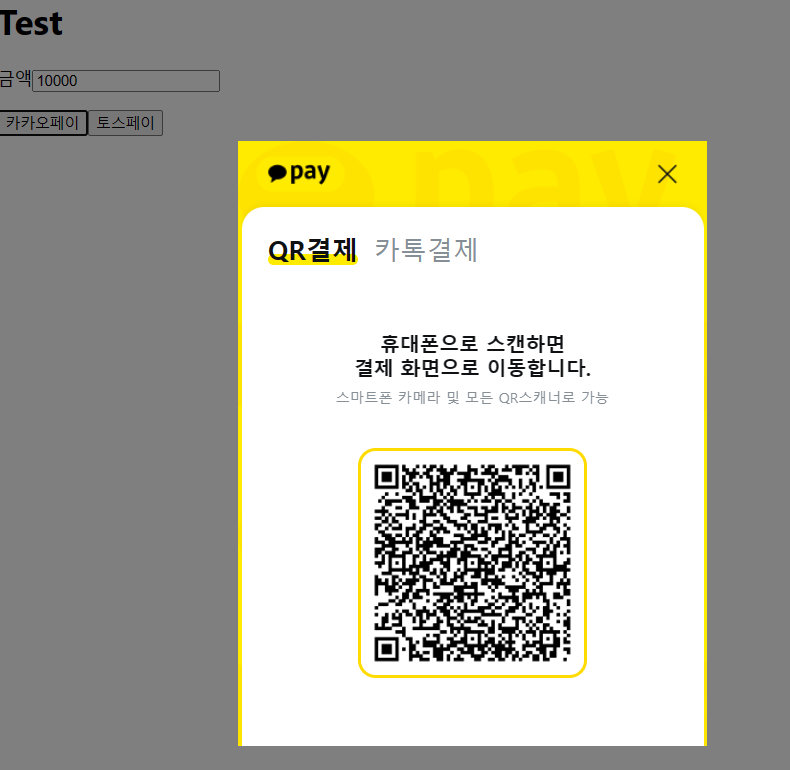
      <p>금액<input type="number" className='amount' onChange={handleChange}></input></p>
      <button onClick={() => ClickChargeBtn('kakaopay', amount, 'nickname', 'http://localhost:3000/redirect')}>카카오페이</button>
      <button onClick={() => ClickChargeBtn('tosspay', amount, 'nickname', 'http://localhost:3000/redirect')}>토스페이</button>
    </div>
  );
}

export default App;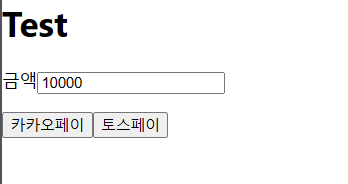
- 결제에 성공을 하면 해당 JSON을 반환해준다.
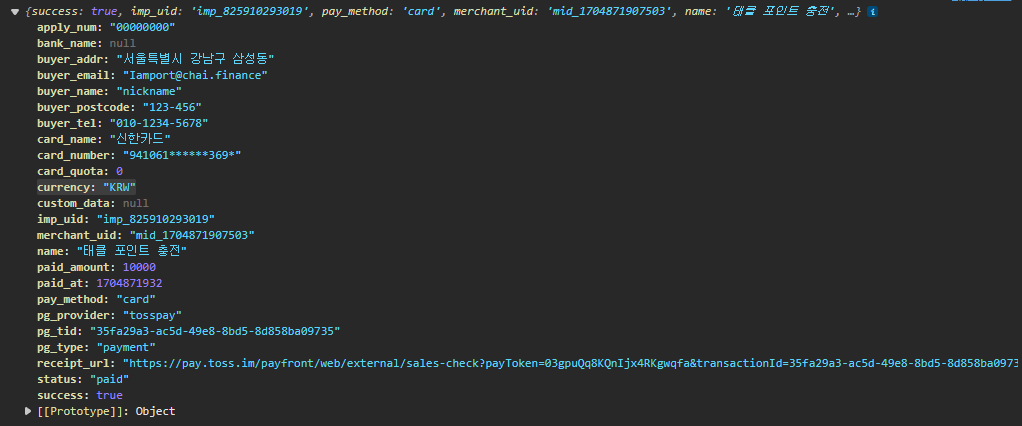
- 여기에서 백엔드를 활용해 이 결제에 대하여 정확히 잘 결제가 되었는지, 충전 금액에 대한 변조는 없는지에 대하여 2차로 검증을 하고, DB에 저장을 하는 과정을 작성해보겠습니다.
Back-end(SpringBoot)
SpringBoot 패키지 내 build.gradle에 해당 내용 추가
dependencies {
	implementation 'com.github.iamport:iamport-rest-client-java:0.2.21'
}

repositories {
	allprojects {
			repositories {
				maven { url 'https://jitpack.io' }
			}
		}
}PaymentController
package com.test.springtest.payment.controller;

import com.siot.IamportRestClient.exception.IamportResponseException;
import com.test.springtest.payment.dto.PaymentDto;
import com.test.springtest.payment.service.PaymentService;
import org.springframework.stereotype.Controller;
import org.springframework.web.bind.annotation.PathVariable;
import org.springframework.web.bind.annotation.RequestMapping;
import org.springframework.web.bind.annotation.ResponseBody;

import java.io.IOException;

@Controller
public class PaymentController {
    private final PaymentService paymentService;

    public PaymentController(PaymentService paymentService) {
        this.paymentService = paymentService;
    }

    @ResponseBody
    @RequestMapping("/verify/{imp_uid}") // https://URL/verify/{거래고유번호}
    public PaymentDto paymentByImpUid(@PathVariable("imp_uid") String imp_uid)
            throws IamportResponseException, IOException {
                return paymentService.verifyPayment(imp_uid); // 결제 검증 및 DB 값 삽입
    }
}PaymentDto
package com.test.springtest.payment.dto;

import lombok.AllArgsConstructor;
import lombok.Builder;
import lombok.Getter;
import lombok.Setter;

@AllArgsConstructor
@Getter
@Builder
@Setter
public class PaymentDto {
    private String impuid; // 거래 고유 번호
    private String name; // 상품명
    private String status; // 결제여부 paid : 1 , 그 외 실패
    private Long amount; // 결제금액

}PaymentEntity
package com.test.springtest.payment.entity;

import com.test.springtest.payment.dto.PaymentDto;
import jakarta.persistence.*;
import lombok.*;

@Getter
@Setter
@Entity
@Table(name="payment_list", indexes={@Index(name = "impuid_index", columnList = "impuid", unique = true)}) // impuid 인덱스 생성
@Builder
@NoArgsConstructor
@AllArgsConstructor
public class PaymentEntity {

    @Id
    @GeneratedValue(strategy = GenerationType.AUTO)
    private Long payment_id;
    // DB 내부 결제 고유 번호

    @Column(name="impuid")
    private String impuid;
    // 결제 고유 번호

    @Column(length = 255)
    private String name;
    // 상품명

    @Column
    private String status;
    // 결제 여부

    @Column
    private Long amount;
    // 금액

    // Dto -> Entity 변환
    public PaymentEntity(PaymentDto dto) {
        this.impuid = dto.getImpuid();
        this.amount = dto.getAmount();
        this.name = dto.getName();
        this.status = dto.getStatus();
    }
}PaymentRepository
package com.test.springtest.payment.repository;

import com.test.springtest.payment.entity.PaymentEntity;
import org.springframework.data.jpa.repository.JpaRepository;


public interface PaymentRepository extends JpaRepository<PaymentEntity, String> {
    public long countByImpuidContainsIgnoreCase(String impuid); // 결제 고유 번호 중복 확인
}PaymentService
package com.test.springtest.payment.service;

import com.siot.IamportRestClient.IamportClient;
import com.siot.IamportRestClient.exception.IamportResponseException;
import com.siot.IamportRestClient.response.IamportResponse;
import com.siot.IamportRestClient.response.Payment;
import com.test.springtest.payment.dto.PaymentDto;
import com.test.springtest.payment.entity.PaymentEntity;
import com.test.springtest.payment.repository.PaymentRepository;
import org.springframework.stereotype.Service;

import java.io.IOException;

@Service
public class PaymentService {

    private final IamportClient iamportClient;
    private final PaymentRepository paymentRepository;

    public PaymentService(PaymentRepository paymentRepository) {
        // 포트원 토큰 발급을 위해 API 키 입력
       this.iamportClient = new IamportClient("REST_API_KEY",
                "REST_API_SECRET");
        this.paymentRepository = paymentRepository;
    }

    public PaymentDto verifyPayment(String imp_uid) throws IamportResponseException, IOException {
        IamportResponse<Payment> iamportResponse = iamportClient.paymentByImpUid(imp_uid); // 결제 검증 시작
        Long amount = (iamportResponse.getResponse().getAmount()).longValue(); // 결제 금액
        String name = iamportResponse.getResponse().getName(); // 상품명
        String status = iamportResponse.getResponse().getStatus(); // paid 이면 1

        PaymentDto paymentDto = PaymentDto.builder() // Dto 변환
                .impuid(imp_uid)
                .amount(amount)
                .status(status)
                .name(name)
                .build();

        if (paymentRepository.countByImpuidContainsIgnoreCase(imp_uid) == 0) { // 중복하는 값이 없으면
            if (iamportResponse.getResponse().getStatus().equals("paid")) { // 결제가 정상적으로 이루어졌으면
                PaymentEntity paymentEntity = new PaymentEntity(paymentDto); // Dto -> Entity 변환
                paymentRepository.save(paymentEntity); // 변환된 Entity DB 저장
                return paymentDto; // 클라이언트에게 Dto 값 JSON 형태 반환
            } else {
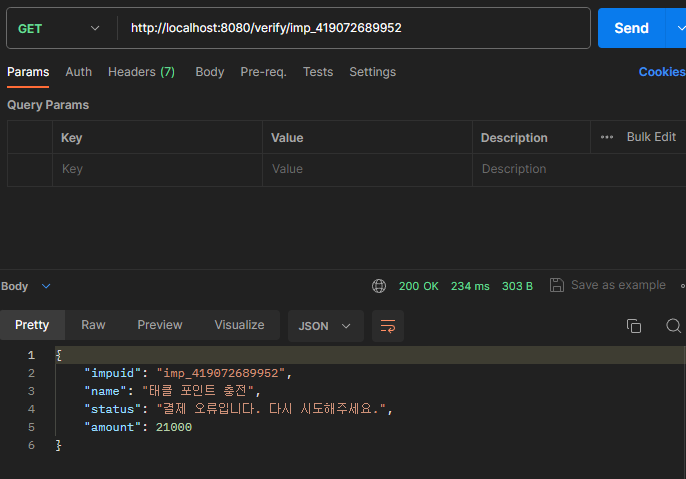
                paymentDto.setStatus("결제 오류입니다. 다시 시도해주세요."); // 클라이언트에게 Status 값 오류 코드 보냄
                return paymentDto;
            }
        } else {
            paymentDto.setStatus("이미 결제 되었습니다."); // 클라이언트에게 Status 값 오류 코드 보냄
            return paymentDto;
        }
    }
}결제 완료
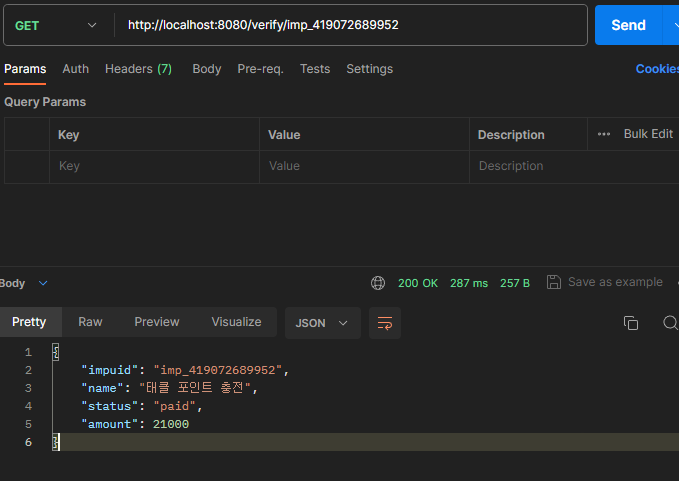
결제 검증 실패
DB에 반영이 되었을 때
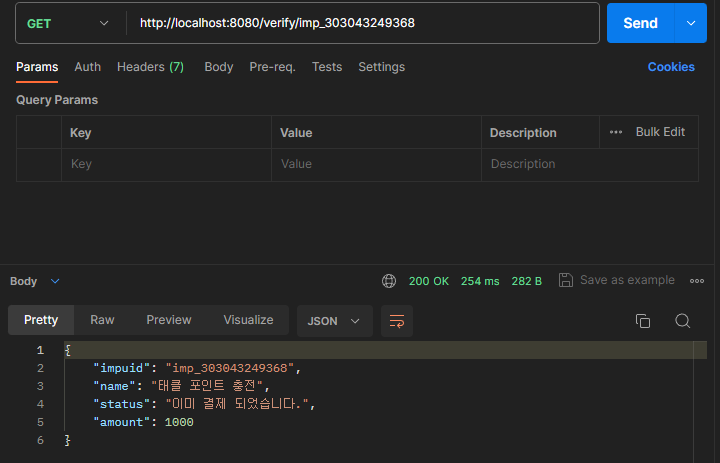
프론트앤드(React)에서 결제 완료 후 백앤드로 결제 검증 후 DB 저장
import React, {useState} from 'react';
import axios from 'axios';

function App() {
  const [amount, setAmount] = useState(0);

  const handleChange = (e) => {
    setAmount(e.target.value);
  }

  const ClickChargeBtn = (pg_method, amount, nickname, redirect_url) => {
    const { IMP } = window;
    IMP.init('imp가맹점번호'); // 가맹점 번호 지정
    IMP.request_pay({
      pg : `${pg_method}`, // 결제 방식 지정
      pay_method : 'card',
      merchant_uid: `mid_${new Date().getTime()}`, // 현재 시간
      name : '포인트 충전',
      amount : `${amount}`, // 충전할 금액
      buyer_email : 'Iamport@chai.finance',
      buyer_name : `${nickname}`, // 충전 요청한 유저의 닉네임
      buyer_tel : '010-1234-5678',
      buyer_addr : '서울특별시 강남구 삼성동',
      buyer_postcode : '123-456',
      m_redirect_url: `${redirect_url}` // 만약 새창에서 열린다면 결제 완료 후 리다이렉션할 주소
  }, function (rsp) { // callback
      if (rsp.success) { // 만약 결제가 성공적으로 이루어졌다면
        axios.get(`http://localhost:8080/verify/` + rsp.imp_uid)
        .then((response) => {
          console.log(response);
        })
        .catch((error) => {
          console.error(error);
        });
        alert("결제 성공");
        console.log(rsp);
      } else {
        alert("결제 실패");
        console.log(rsp);
      }
  }
  );
}
  return (
    <div className="App">
      <h1>Test</h1>
      <p>금액<input type="number" className='amount' onChange={handleChange}></input></p>
      <button onClick={() => ClickChargeBtn('kakaopay', amount, 'nickname', 'http://localhost:3000/redirect')}>카카오페이</button>
      <button onClick={() => ClickChargeBtn('tosspay', amount, 'nickname', 'http://localhost:3000/redirect')}>토스페이</button>
    </div>
  );
}

export default App;주의
- CORS 문제 발생할 수도 있습니다.
- 예제 및 테스트 이기에 Spring, React 코드 예외처리 미흡
Docs
반응형